04 Ways to Enable or Disable DNS Client Service in Windows 10. DNS Client Services is a in-built service of windows which helps in resolution while browsing to the Internet. It translate domain names to IP address. When you enable this service in your computer, DNS runs as a service on the computer. You can operate manually DNS Client services, means enable or disable it
How to Enable or Disable DNS Client Service in Windows 10.
There are four ways to enable or disable these services. These are: –
Way-1: Through Registry Editor
Warning: If you make any incorrect changes in Registry, your computer will be at Risk.
You can Enable or Disable it in Windows 10 by changing the value of Registry entries. Follow the following steps: –
- Make a Click on Start menu icon and type regedit in it.
- Select Registry Editor option form the list appear.
- A UAC will prompt up, click on Yes for positive consent.
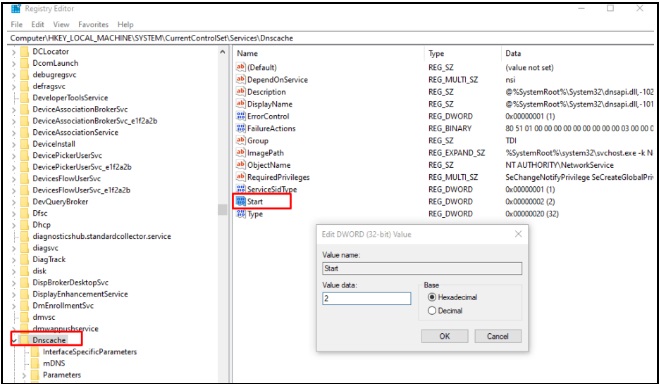
- When Registry Editor page displays into the view, navigate the under mentioned path from the left pane –
- HKEY_LOCAL_MACHINE\SYSTEM\CurrentControlSet\Services\dnscache
- Now from the right pane, make a Double click on the Start DWORD to modify its value.
- In the Value data box, put preferred value and then click OK button.
- Automatic – 2
- Manual – 3
- Disabled – 4
- Automatic (Delayed Start) – 2
Way-2: Enable or disable DNS Client service by System Configuration
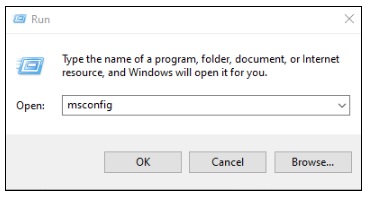
Step-1: Open Run dialog box.
Step-2: Type msconfig in the text box and press Enter.
Step-3: System Configuration wizard will appear. Here, click on Services tab.
Step-4: Locate DNS Client from the available services. If you want to Disable it, untick the checkbox of the same.
Step-5: To keep the service enabled, simply click on the checkbox to keep the tick mark.
Step-6: Subsequently, Click Apply and then OK button.
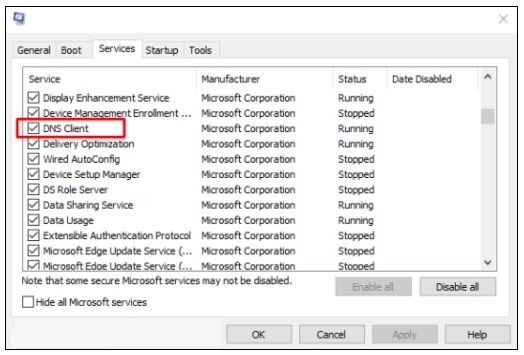
Step-7: You must reboot the device otherwise the changes will not take place.
Way-3: Use Command Prompt to enable or disable DNS Client service in Windows 10
You can enable or disable it by using Command Prompt. Here is the process to perform this action: –
Step#1: Open Run dialog box.
Step#2: Type cmd.exe in the empty text bar and press Ctrl+shift+Enter key conjointly.
Step#3: When a UAC turns up, click Yes to run Command Prompt as admin.
Step#4: If you want to disable it in Windows 10, run the following command in elevated Command Prompt –
net stop dnscache
Step#5: To enable the same, type the following and press Enter: –
net start dnscache
This will Enable DNS Client Services instantly unless otherwise, the Startup type of this service is Disabled.
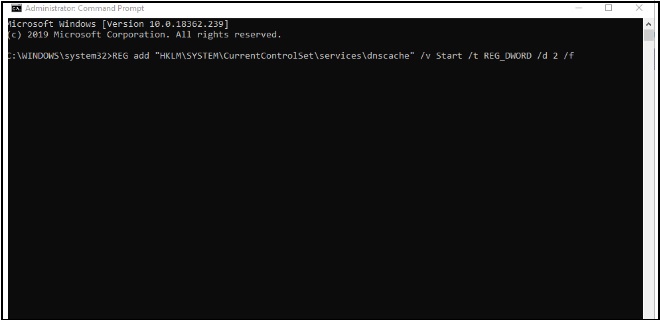
Step#6: To change the Startup type, execute the preferred command listed below –
Automatic –
REG add “HKLM\SYSTEM\CurrentControlSet\services\dnscache” /v Start /t REG_DWORD /d 2 /f
Manual –
REG add “HKLM\SYSTEM\CurrentControlSet\services\dnscache” /v Start /t REG_DWORD /d 3 /f
Disabled –
REG add “HKLM\SYSTEM\CurrentControlSet\services\dnscache” /v Start /t REG_DWORD /d 4 /f
Automatic (Delayed Start) –
REG add “HKLM\SYSTEM\CurrentControlSet\services\dnscache” /v Start /t REG_DWORD /d 2 /f
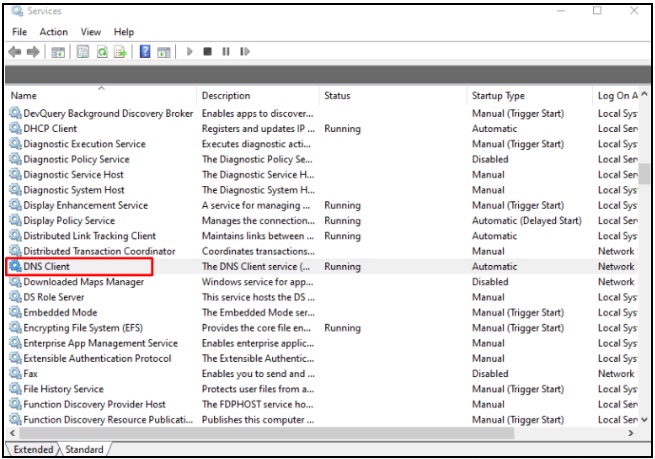
Way-4: Enable or Disable DNS Client Services by Using Services Console
- Open Windows Search Bar by pressing Win+Q conjointly.
- Type services.msc in the text field and hit Enter when the result displays.
- On the Console, find out DNS Client available under Name column.
- Make double-click on the same to open its Properties.
- Go to Startup type segment and use the drop-down menu to choose Automatic.
- Now, click on the Start button to enable DNS Client Service in Windows 10.
- To disable the same service, simply hit the Stop button.
- Finally, click Apply and OK button to make the changes effective.
People also search for
- How to restart DNS client service in Windows 10
- dns client service stopped
- Can’t restart dns client services
- Windows could not start dns client service local computer
Thnx. Please write in comment box with your feedback of this article.
