How to Adjust Menu Height Windows 10. At first we have to know about what is Menu Height and what are the requirement of adjustment in Menu Height windows 10. As it is clear of its name that it is related to menu bar where options such as File, Edit, Tools are located. It is possible to increase or decrease of its height which is called menu height. You can perform this action in windows 10 with the help of registry editor and few other tips as described below with easy screenshots. Basically, you may apply this action to change in Menu Height by a formula.
How to Adjust Menu Height Windows 10 through registry editor
The following are the easy steps which you should follow to adjust Menu Height Windows 10 through registry editor: –
Step-1: Open the Run dialog box and type regedit and click OK.
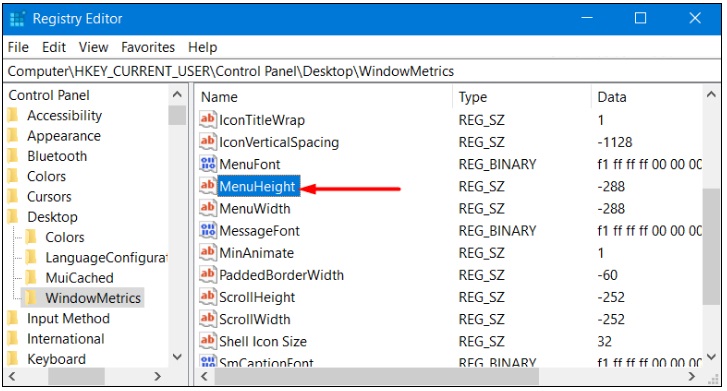
Step-2: When you find Registry Editor, go to the following location from the left sidebar.
HKEY_CURRENT_USER\Control Panel\Desktop\WindowMetrics
Step-3: Switch to the right pane and find the (REG_SZ) string value called Menu Height as per screenshot.

Step-4: Here, you need to change the data value so that change the height of the menu.
Step-5: You should apply the following formula to change i.e either Decrease or Increase Menu Height in Windows 10.
-15 * (The height terms of pixels)
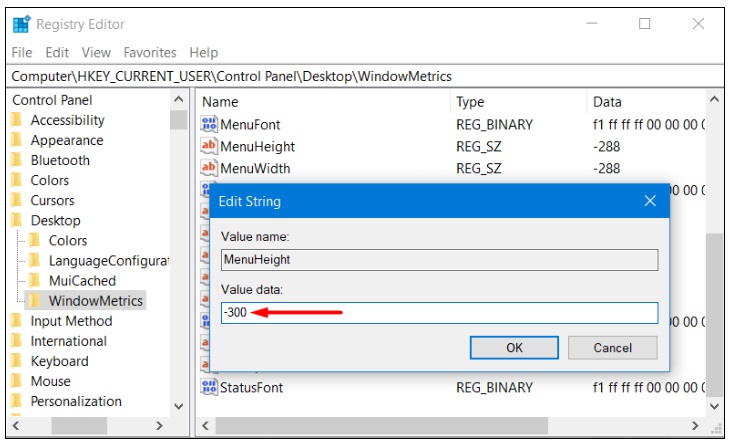
Therefore, if, say, the default MenuHeight value data given there is -150, then the height in pixels would be 10. So, in case you want to set the height to 20 pixels, set the value data as:
-15 * 20= -300
Thus, the menu bar will have a height of 20 pixels if you set the value data to -300.

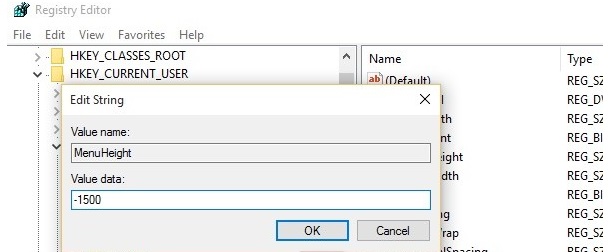
Step 6. If you want to set the row height to 100 px, then by formula the value should be -15*100= -1500.
Step 7. Close the Registry Editor.
Step-8. Reboot or sign out and sign back in to see the changes.

You should back any time to previous size by using this formula through Registry editor.
Also Read : Simple Method to Screen Record on Windows 10
Thnx.
