How to change default Font Style in Windows 10. To change the default font style in windows 10 is no possible easily. You can’t change it through setting app or control panel. Although its not important to change default font style, even if you want to change default font in windows 10, you will have to modify the Registry.
The default font style is “Segoe UI” font. Some users don’t like this font and want to change this font. You can change the fonts of icons, Context menu, properties or advanced dialog box. Here in this article, we will take you through the steps to see How to change default Font Style in Windows 10. The process to change default font style through Registry is little bit risky. You should be more careful while editing Registry.
How to change default Font Style in Windows 10 System
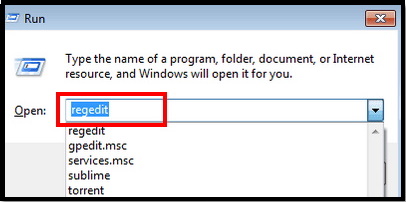
- Press Win+R to launch Run dialog box.
- Type regedit in it and press Enter.

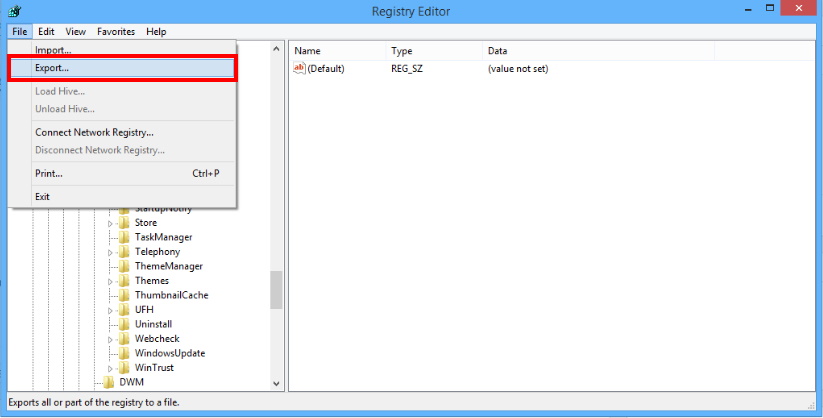
- Registry Window will open.
- From the left side of Registry Window, select File option.
- Click on Export.
- Save this registry file in your hard drive.

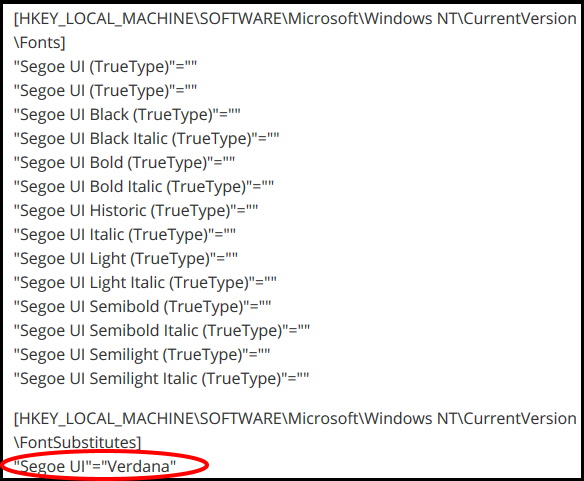
- Open Notepad and note the following items:

- Go to the last line which you recently noted in notepad.
- Change Verdana and enter your new font style. You should enter correct and full name of the font.
- Now click on file and save option.
- Select the file as “Save as“
- Type of file should be “All files“.
- Name of file should be of .reg extension type.
- Choose a name ends with .reg.
- Again click on save button.
- Now go to that registry file which you created earlier.
- Apply a double click o it to open it.
- You’ll be prompted to allow the file to make changes to the computer and confirm you want to continue.
- You will receive a confirmation regarding saving of changes successfully made.
- Reboot your system.
How to Restore Default Font in Windows 10
Now if you want to revert your default font style in windows 10, follow these steps: –
- Go to Start menu.
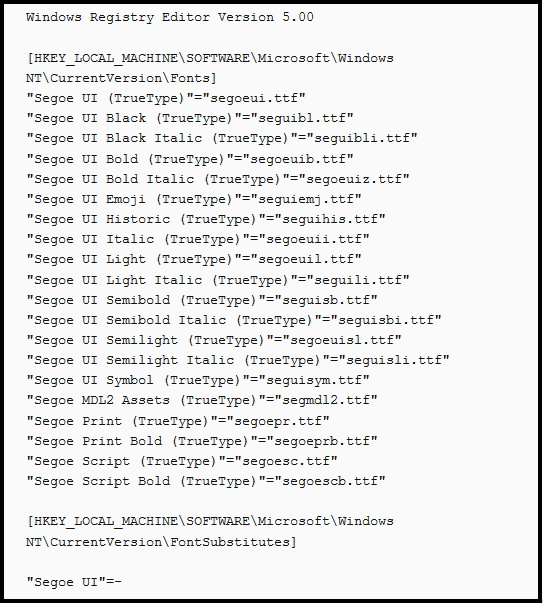
- Type Notepad under search box and click the top result to open the app.
- Now enter the following registry code into the text file:

- Click on the File option of Notepad.
- Click the Save As option.
- Under the “Save as type” option, select the All Files option.
- Choose name of your file ending with the .reg extension. For example, default-font.reg.
- Then click on the Save button.
- Apply right click on the “.reg” file and select the Merge option.
- A pop up window will appear for confirmation.
- Click on the Yes button.
- Click the OK button.
- Restart your device.
That’s all.
