How to disable User Account Control (UAC) in Windows 10. At first we will have to understand what is User Account Control Windows 10 which is also known as UAC. You may call It a Windows security layer of your system. User Account Control helps prevent potentially harmful programs from making changes to your Computer. Whenever any user try to install app from third party sources or try to change in the settings of the administrator level, An UAC prompt on your screen with asking your permission: –
“Do you want to allow the following program to make changes to this Computer?”
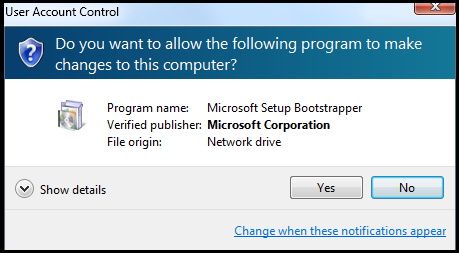
Although, User Account Control provides a better security to your windows system, but sometimes it annoys you more when you frequently use Administrative level works on your windows 10 system. You can disable UAC windows 10 for specific program. Here in this article, we will see how to disable User Account Control (UAC) in Windows 10 /8 / 7.
How to disable User Account Control (UAC) in Windows 10
You can turn off appearance of UAC by change user account control setting. There are three ways by which you can stop User Account Control in Windows 10 / 8 / 7.
Ways-1: Disable through UAC prompt Window
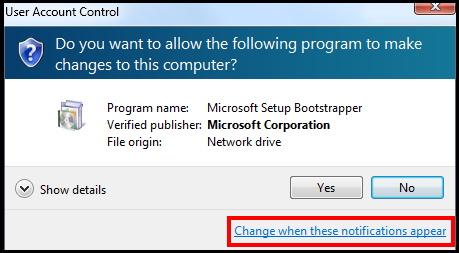
- Try to open any Application so that an UAC could prompt on your screen.
- In UAC prompt window, go to the bottom.
- Here you will find a link of the option Change when these notifications appear.
- Make a click on this link.
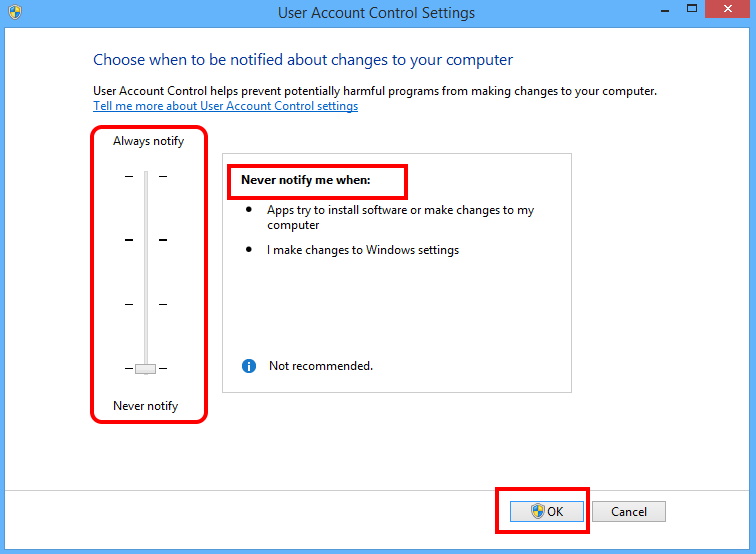
- User Account Control Settings window will open now.
- Left side of page, you will see a notification slider.
- Drag it and stop whether the option exist “Never notify me“.
- Thereafter click on Ok button.
Ways-2: Disable User Account Control (UAC) through Control Panel
You can also turn off the appearance of UAC prompt window through Control Panel. Go through these steps: –
- Open Control Panel.
- Choose the option Security and Maintenance.
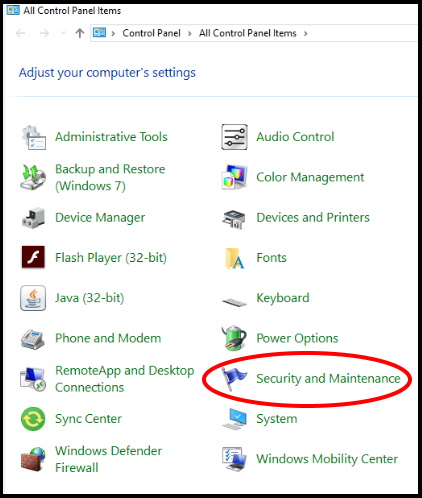
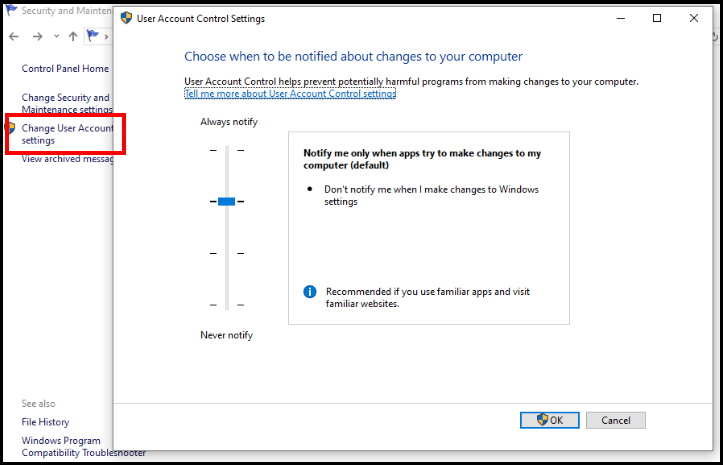
- Now from the left pane, choose the option Change User Account Control Settings.
- In the new page, drag the slider and set it as per your requirement.
- Now drag your slider to the last position, Never Notify to disable it.
- Thereafter Click on Ok button to save the changes.
Ways-3: Disable UAC from User Account
You can also stop User Account Control to be appeared through User Accounts. Follow these steps: –
- Again go to Control Panel of your Windows System.
- Navigate the option User Accounts.
- Make a click on it to open.
- Here, you will find the option Change User Account Control Settings under Make changes to your user account.
- Click on it.
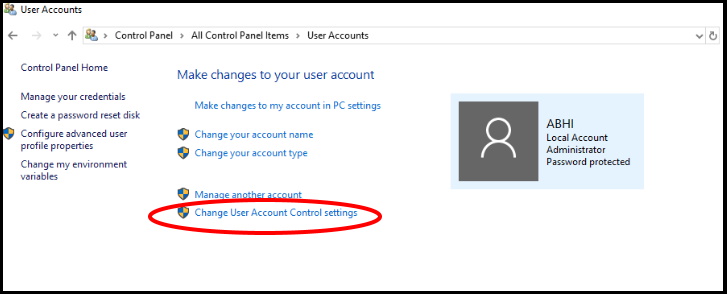
- Now go to the option Never Notify by using slider to stop UAC in Windows 10 / 8 / 7.
That’s all.
