How to reinstall Webcam Driver in Windows 10. Users have to occasionally face such issue that their webcam is not working properly. The installation of webcam driver may be a reason behind this issue. There may be so many causes of this issue such as outdated driver, antivirus issue and so on. Today, in this article we will discuss about how to reinstall webcam driver to solve this issue. Roll back to a previous version is the most useful fix to resolve the issue regarding webcam not working properly.
Ways to Reinstall Webcam Driver in Windows 10
Before installing webcam driver, you must uninstall previously installed driver from your windows 10 system. Here are the procedure to uninstall the driver: –
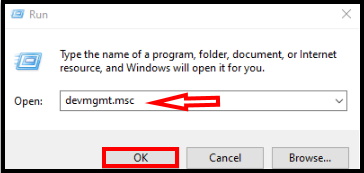
- Open RUN dialog box.
- Type devmgmt.msc under the typing field of Run dialog box to open device manager.

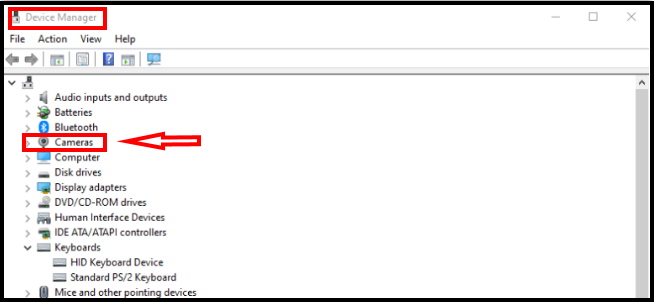
- Go o the camera section from the drop down menu of device manager.
- Navigate the webcam device whose driver you’d like to reinstall.
- Make a double click on it to expand.
- Moreover, you can click on the arrow mark before the device name as an alternative way.

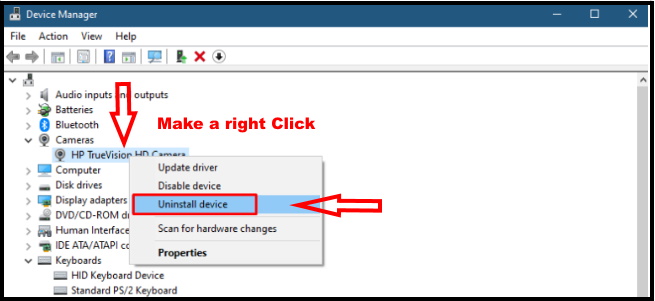
- Make a right click on the chosen driver.
- Then, from the fly-out menu, click on ‘Uninstall device’.

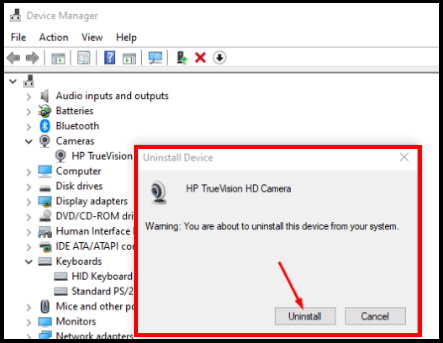
- When you do so, a dialog box will appear warning and requiring confirmation for uninstalling.
- Click on ‘Uninstall’ button.

- Don’t forget to restart the system once the device is uninstalled.
- Usually, the system automatically installs the drivers bringing out from system files once you restart.
That’s all.
